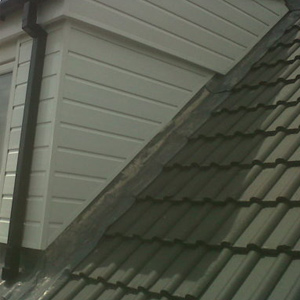
There are several areas of your roof that are susceptible to water infiltration – your chimney, your valleys, and your vents. In order to prevent water from seeping into these areas and causing damage, you’ll want to install flashing. Here, our roofing repair experts explain how to install roof flashing in all three of these areas:
Chimney
- Lay your base flashing around the chimney (make sure it’s about 4″ past each end).
- Next, on your first piece of step flashing, cut a notch so that you can bend it to fit along the side of the chimney and the base.
- Use roofing cement to attach the base to the roofing shingles.
- After that, ensure the base flashing stays put by driving a galvanized nail through it.
- Notch the next piece of flashing and lay it next to the first, overlapping the first by around 2″.
- Secure it in the same way.
- Continue steps 2-6 until you’ve laid flashing around the whole chimney.
- Next, you’ll want to install counter flashing to complete the project.
- First, determine where it’s going to go.
- Next, using your grinder and diamond blade, cut about 1″-1 1/2″ deep into the joint between two bricks all the way around the chimney.
- Measure the length of the channel across the lower base of the chimney and cut a piece of flashing to that measurement plus about 3″ extra.
- Lay your counter flashing over your step flashing with each end extending about 1 1/2″ past the edge of the chimney.
- Make a notch in each end so that it can wrap around the corners.
- After that, apply a generous amount of exterior sealant into the channel you’ve cut.
- Press the upper edge of the flashing into the channel.
- Bend the notched corners around the sides of the chimney and press the upper edges into the channel.
- Continue this process across the sides of the chimney and the upper base of the chimney.
Vent Pipe
- Using your pry bar, loosen the shingles around the top of your vent.
- Next, remove the shingles that are along the sides of the vent.
- After that, lift up the shingles above your vent and slide the top of the vent flashing underneath them.
- For extra protection, cut a piece of waterproof membrane for the flashed area.
- Run a bead of sealant around the area of the vent pipe opening and lay the membrane in place.
- Next, spread caulk along the sides of the vent flashing (but not the bottom) and press the flashing into place.
- Drive a nail into the flashing every 2″ all the way around the piece.
- Replace the shingles you’ve removed by running a bead of sealant around the perimeter before pressing into place.
- Secure the removed shingles with nails. That’s how to install roof flashing!
Valley
- First, measure then length of your valley.
- Next, cut your valley flashing to the length measurement. (If needed, cut several pieces to add up to the right measurement.)
- After that, cut a piece of waterproof membrane to the same length and make sure its width is as wide as your valley flashing.
- Run a bead of sealant along the membrane and attach it to your valley.
- Next, lay your flashing down and make sure it’s flush with the drip edges at the bottom of the valley.
- Attach your flashing to your roof using your hammer and galvanized nails. (Drive a nail into the flashing along the edges and at every 8-12″.)
- Seal any flashing seams with roofing cement for extra protection. That’s how to install roof flashing!