A strong wind gust or a tree limb scraping the roof can cause minor damage to shingles. Luckily, handy homeowners can complete small repairs to missing or damaged shingles. As with all roof work, safety is important. You should not work on roofs with steep inclines that require special procedures to prevent falls. As long as you are safe up there, you can easily learn how to replace missing shingles. Here, the roof repair experts at PJ Fitzpatrick teach you step by step.
Learn How to Replace Missing Shingles
- Buy a bundle of shingles that match your existing roof. You might have a partial bundle left at your home from when the roof was installed. If you do, use these for an exact match.
- Wait for a dry day to perform the repair.
- Position the ladder in a stable location and carry your tools and supplies up to the work area.
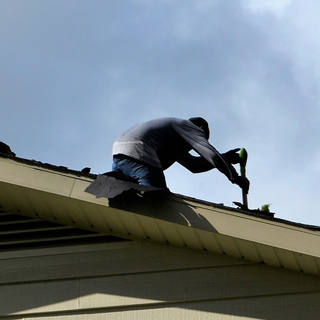
- Take the pry bar and lift the section of intact shingles immediately above the damaged or missing shingles. This exposes the row of nails holding down the damaged shingles.
- Pry up the damaged shingles or any remnants still attached.
- Use the curved end of the pry bar to remove the nails.
- Often two rows of nails secure shingles. Use the pry bar to expose the second row and remove those nails as well.
- Discard damaged shingles or remnants.
- Slide the new shingle into place. Make sure that it is straight.
- If only 1 piece of a 3-tab shingle is damaged, then you can cut a single tab from a section of new shingle and install it. Use the utility knife to cut the replacement piece.
- Nail the new shingle to the roof deck. Each 4-foot section of 3-tab shingles requires 4 nails.
- Re-nail shingles above the repair area where you had to take out nails.
- Load the sealant into the caulking gun. Seal the shingle flaps down on each other to create a smooth surface.