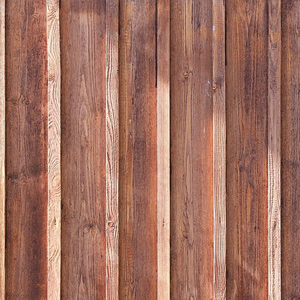
Board and batten siding offers a rustic charm to homes, cabins, garages, and more. The design of wide boards and overlaying narrow boards creates a durable and easy-to-repair siding system that’s proven to last. Best of all, the installation process isn’t too difficult. Here, our siding installation experts explain how to install board and batten siding:
Preparing the Area
- First of all, if your boards and battens aren’t already colored, stain or paint them.
- Next, make sure your home is ready for installation. Remove any rotten boards you find and secure any loose boards or wood trim.
- Scrape away any old caulking around your windows and doors so that your new siding will sit flush against the walls.
- Remove any moldings, downspouts, or lighting fixtures that may get in the way of your new board and batten siding installation.
Installing the Boards
- Before you begin your vertical board installation, you’ll want to install a skirt board (one that’s wider than your siding boards) and a drip edge.
- Place your skirt board horizontally at the bottom of where your siding will end and make sure it’s level.
- Once it’s level, use your hammer or nail gun to install three vertical nails every 18″-24″.
- After that, install your drip edge. For this, you can simply use a piece of metal flashing.
- Next, you’ll want to begin installing your siding boards.
- Starting at one corner of your home, begin by placing a board flush up against the wall and making sure it’s plumb.
- Once it is, install two nails at the top of the board and two nails at the bottom to secure it.
- Then, install two more nails every 18″-24″ along the length of the board.
- Next, measure the gap you’d like in between your boards. (This width depends on the width of the battens you’re using. Your battens should cover the gap plus overlap at least 3/4″ on either side.)
- Install your next board the same way as the first board and continue down the side of your home until you reach the other corner.
- Make sure to measure above and below any windows you may have and cut your boards to the appropriate size to install above and below them.
Installing the Battens
- Before you install your battens, you’ll want to install your top trim (if you’re using any).
- Once you’ve installed your top trim, make sure you cut your battens to accommodate for it.
- Next, starting at one corner of your home, place your batten over the gap between your boards.
- Make sure it’s centered and plumb, then install your nails on the top, bottom, and one every 18″-24″ along the length of your batten.
- Continue installing your battens this way until you’ve reached the other corner of your home.
- Once you’ve completed all sides of your home, finish your board and batten siding look with two adjoining pieces of trim along each corner.
- And that’s how you install board and batten siding!