Today’s windows are built to be both strong and efficient, however, if carpentry is something you love to do, you can create your own windows. There are many different styles of windows, from awning to casement to double-hung and more. For this how-to, our window installation experts explain how to build a window known as a picture window.
Measuring the Planks
- The first step for how to build a window is to measure your window openings to determine how long, wide, and deep your windows should be.
- Next, choose a type of wood (like pine, spruce, or cedar) that’s easy to work with but also sturdy.
- Gather several planks of this wood that measure the depth you want for your windows.
- After that, measure and cut two stiles from these planks. Your stiles should be the entire height of your window minus 1/8″ to allow for expansion.
- Then, cut two rails from these planks. Your rails should be the full width of your window minus 1/8″, minus the width of your stiles, plus a few inches to allow for tenons. Your tenons can be the entire length of your stile width or less, depending on what you’d like.
- This means for example: If your window is 24″ high and 36″ wide, your stiles should be 23 7/8″ and your rails should be 35 7/8″ – stile width + tenon length”.
Creating the Tenons and Mortises
- Next, use your pencil to mark where the tenons will be on your rails. You’ll want your measurement to plan for a haunched tenon.
- Attach your t-track miter attachment and your tenon jig to your table saw.
- Make two shoulder cuts in each of your rails in the area where you marked your tenons. (The cuts should split the depth of your rail into three even parts.)
- After that, mount the rails back in the jig to cut the haunched shoulder.
- Remove the jig so you can use the saw blade to remove the shoulder material.
- This should leave you with one tenon in the middle of each of your rails.
- Next, mark the mortises on your stiles. You can do this by using your already made tenons – simply use your pencil to outline them onto your stiles.
- Using your mortiser, cut your mortise holes.
- Once all of your tenons and mortises are created, you can dry-fit your stiles and rails together to see how they fit.
Routing the Edges
- If your stiles and rails fit well together, you can move on to routing the edges.
- Mount your coping bit and determine which sides on your stiles and rails will be face down.
- Align the height so that the top of the bit is just touching your tenon, with the face side down.
- Make your coping cut on all four sides of each rail.
- Next, mount your sticking bit and align it so that the sticking cut will have the same reveal and the part in the middle of the coped rail edges.
- Make your sticking cut on all four sides of each stile, face sides down.
- Dry-fit your stiles and rails together again. If your tenons stick out further than the edges of the window, you can use a hand saw or your table saw to cut off the excess.
- Once your window fits how it should, use wood glue to permanently attach all of your pieces. Let dry, then prime and stain or paint.
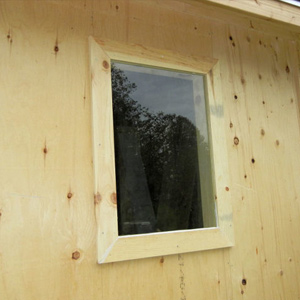
- Finally, insert your glass plane. That’s how to build a window!
*Photo courtesy of ibuildit.ca