Gaps between your home’s siding and foundation might seem minor at first, but they can quickly lead to bigger issues if left unaddressed. These openings allow water, pests, and outside air to enter your home, potentially causing moisture damage, higher energy bills, and even structural problems over time. Learning how to properly seal these gaps is an essential part of home maintenance and can help protect your property for years to come.
Whether you’re dealing with vinyl, wood, or fiber cement siding, the process is relatively straightforward with the right tools, materials, and approach.
Why Sealing Gaps Is Important
Before getting started, it’s important to understand why sealing gaps between your siding and foundation is so essential. Even small openings can allow water to seep in, potentially leading to mold growth, mildew, or damage to your foundation. These gaps can also let outside air enter your home, reducing energy efficiency and making it harder to maintain consistent indoor temperatures. In addition, they create easy entry points for insects and rodents, increasing the risk of pest infestations. Over time, continued exposure to moisture can weaken both your siding and foundation materials, making proper sealing a key step in protecting your home’s overall structure.
Step-by-Step Instructions
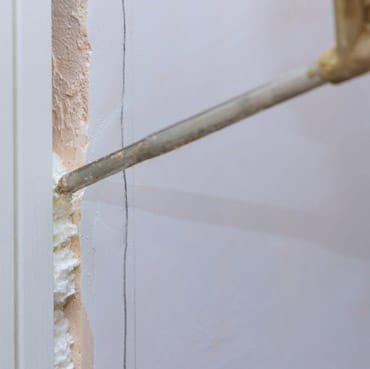
1. Inspect the Area
Begin by closely examining the gap between the siding and foundation to understand the scope of the issue. Look for cracks, uneven spacing, signs of water damage or mold, and any loose or damaged siding panels. Measuring the width and depth of the gap will help you determine whether additional materials like a backer rod or foam filler are needed.
2. Clean the Surface
A clean surface is essential for proper sealing. Remove any dirt, debris, old caulk, or loose material using a wire brush or putty knife. After clearing the area, wipe it down with a mild cleaning solution and allow it to dry completely to ensure the new sealant adheres effectively.
3. Insert Backer Rod (If Needed)
For gaps wider than about 1/4 inch, inserting a backer rod provides a solid foundation for the caulk. This foam material helps control the depth of the sealant, reduces excess usage, and improves flexibility and durability. Press it into the gap so it sits just below the surface.
4. Apply Expanding Foam (For Large Gaps)
If the gap is particularly large or deep, expanding foam insulation can help fill the space more effectively. Apply it carefully, as it expands significantly, and once it has fully cured, trim away any excess to create an even surface for caulking.
5. Apply Caulk
Using a caulking gun loaded with exterior-grade caulk, apply a steady, even bead along the gap. Cut the nozzle at a 45-degree angle for better control, and focus on filling the space completely without over-applying. For a cleaner finish, painter’s tape can be applied along the edges before caulking.
6. Smooth the Sealant
After applying the caulk, smooth it out using a gloved finger or a caulking tool to ensure proper adhesion and a neat appearance. This step also helps eliminate air pockets. If you used painter’s tape, remove it before the caulk begins to set for the best results.
7. Allow Proper Curing Time
Check the manufacturer’s instructions for curing time. Most exterior caulks require at least 24 hours to fully cure. Avoid exposing the area to water during this time.
When To Call A Professional
While sealing small gaps is a manageable DIY project, larger issues—such as significant siding damage, foundation cracks, or persistent moisture problems—may require professional attention. Improper sealing can sometimes trap moisture instead of preventing it, leading to more costly repairs down the line. If you’re unsure about the condition of your siding or want a long-lasting, professional solution, it’s best to consult an expert.