Replacing damaged garage door panels can restore your home’s curb appeal, improve insulation, and maintain the security of your garage. While minor dents and cosmetic issues can sometimes be repaired, more significant damage often calls for panel replacement. If you’re comfortable with basic tools and have some DIY experience, you may be able to tackle this project yourself. Below is a comprehensive guide on how to replace garage door panels safely and effectively.
Important Safety Considerations
Garage doors are heavy and operate under significant spring tension. If your door uses torsion springs and they need to be adjusted or removed during the process, it’s best to consult a professional. Mishandling high-tension springs can cause serious injury. If at any point the project feels unsafe or beyond your skill level, stop and seek expert assistance.
Step-by-Step Instructions To Replace Garage Door Panels
Step 1: Disconnect The Garage Door Opener
For safety, unplug the automatic garage door opener. Pull the emergency release cord to disconnect the opener from the door so it can move manually. This prevents accidental activation during the repair.
Step 2: Secure The Door In Place
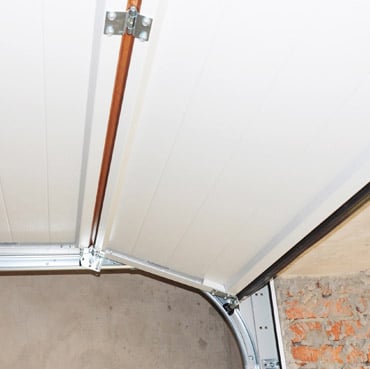
Raise the garage door until the damaged panel is at a comfortable working height. Clamp locking pliers or C-clamps onto the track just below the bottom roller to prevent the door from sliding down while you work. This step is critical for safety.
Step 3: Remove Hardware From The Damaged Panel
Using your socket set or wrench, carefully remove the hinges, brackets, and rollers attached to the damaged panel. Start with the topmost damaged panel and work downward if replacing multiple sections. Keep track of all hardware for reinstallation unless you are replacing it.
If the panel is in the middle of the door, you may need to remove panels above it first. Work methodically to avoid bending tracks or damaging other components.
Step 4: Remove The Damaged Panel
Once the hardware is detached, gently slide the damaged panel out of the track. You may need to use a pry bar or rubber mallet to loosen it if it’s stuck. Be cautious not to warp the track or surrounding panels during removal.
Step 5: Install The New Garage Door Panel
Position the replacement panel into the track and align it with the adjacent panels. Make sure it sits flush and level. Reattach the hinges, brackets, and rollers using the manufacturer-approved fasteners. Tighten all bolts securely, but avoid overtightening, which could strip the hardware.
If you removed additional panels, reinstall them in reverse order, ensuring proper alignment at each step.
Step 6: Reconnect Hardware and Lubricate Moving Parts
Once the new panel is securely in place, reconnect any rollers and hinges you removed. Apply garage door lubricant to rollers, hinges, and tracks to ensure smooth operation.
Step 7: Test The Door
Remove the clamps from the track and carefully lower the door manually to check for smooth movement. If everything operates properly, reconnect the garage door opener and plug it back in. Test the automatic function to confirm the door opens and closes evenly without strain or unusual noises.
When Should You Replace Garage Door Panels?
Garage door panels may need replacement due to storm damage, vehicle impact, warping, rust, or general wear and tear. If only one or two panels are damaged and the rest of the door is in good condition, replacing individual panels can be a cost-effective alternative to installing a brand-new door. However, if the door is older or multiple panels are compromised, full replacement may be the better long-term investment.