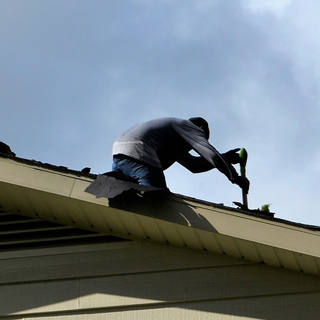
Missing shingles are one of the most common roofing problems homeowners face. High winds, severe storms, falling debris, and aging roofing materials can all cause shingles to become loose or detach from the roof entirely. While a missing shingle may seem like a minor issue, leaving it unrepaired can expose your roof deck to moisture, leading to leaks, wood rot, mold growth, and more extensive roof damage.
If you’re comfortable working at heights and have basic DIY experience, replacing a missing asphalt shingle can be a manageable repair. This guide explains how to replace missing shingles and help protect your home from further damage.
Step 1: Inspect The Damaged Area
Before making repairs, inspect the section of roof where the shingles are missing. Look for signs of additional damage that may need attention.
Check for:
- Cracked or loose surrounding shingles
- Exposed roofing felt or underlayment
- Water damage to the roof deck
- Loose roofing nails
Multiple missing shingles in the same area
If you notice widespread damage or signs of a roof leak, it may be best to contact a professional roofing contractor before attempting repairs.
Step 2: Gather Matching Replacement Shingles
One of the most important aspects of a successful repair is finding shingles that closely match your existing roof. If you have leftover shingles from the original installation, use those whenever possible.
If you don’t have extras available, try to identify the manufacturer, style, and color of your current shingles. Many roofing suppliers can help match existing products or recommend the closest available option.
Matching shingles help maintain your home’s appearance and ensure consistent weather protection.
Step 3: Lift The Surrounding Shingles
Asphalt shingles are installed in overlapping layers. To replace a missing shingle, you’ll need access to the nails securing the shingles directly above the damaged area.
Using a flat pry bar, carefully lift the edges of the shingles above the missing section. Work slowly to avoid cracking or damaging nearby shingles, especially during colder weather when shingles are more brittle.
Gently loosen any roofing cement that may be holding the shingles together.
Step 4: Remove Remaining Nails and Debris
If portions of the old shingle remain, remove any remaining fragments and roofing nails from the repair area.
Use the pry bar to lift nails and pull them free from the roof deck. Make sure the surface is clean and free of debris before installing the replacement shingle.
A smooth, clean surface will help the new shingle sit properly and provide a better seal against moisture.
Step 5: Slide The New Shingle Into Position
Take the replacement shingle and carefully slide it into the open space where the missing shingle was located.
Align the bottom edge with the surrounding shingles to maintain a uniform appearance. Ensure the shingle sits flat and follows the existing pattern of the roof.
Proper alignment is important for both aesthetics and water shedding performance.
Step 6: Secure The Replacement Shingle
Once the new shingle is positioned correctly, secure it using roofing nails.
Most asphalt shingles are fastened with four nails, though some roofing systems may require additional fasteners depending on local building codes and wind exposure requirements.
Drive the nails straight into the designated nailing area of the shingle. Avoid overdriving or underdriving the nails, as both can affect the performance of the repair.
The nail heads should sit flush against the shingle surface without cutting into the material.
Step 7: Apply Roofing Cement
After fastening the replacement shingle, apply a small amount of roofing cement beneath the tabs of the surrounding shingles.
Press the shingles firmly into place to create a secure bond. This helps prevent wind from lifting the shingles before they have an opportunity to reseal naturally through sun exposure.
Use roofing cement sparingly. Excessive amounts can create a messy appearance and may not improve the effectiveness of the repair.
Step 8: Perform A Final Inspection
After the repair is complete, inspect the area carefully.
Confirm that:
- The replacement shingle is aligned properly
- All nails are secure
- Adjacent shingles lie flat
- Roofing cement has been applied where needed
- No exposed nail heads remain
A properly installed replacement shingle should blend in with the surrounding roof and restore protection against water intrusion.
When To Call A Roofing Professional
While replacing a single missing shingle can often be handled as a DIY project, some situations require professional attention.
Consider contacting a roofing contractor if:
- Multiple shingles are missing
- The roof deck appears damaged
- You notice water stains inside your home
- The roof is steep or difficult to access
- Storm damage extends beyond a small repair area
Professional roofers can identify hidden issues and ensure repairs are completed safely and correctly.