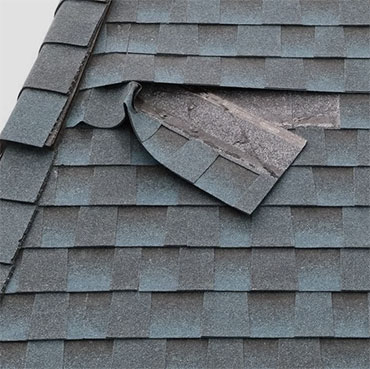
Missing asphalt shingles are more than just an eyesore—they can leave your roof vulnerable to leaks, water damage, and structural problems. Replacing shingles promptly is crucial to maintaining the integrity of your home. Fortunately, with the right tools, materials, and careful technique, homeowners can replace missing shingles without causing additional damage to the roof. Here’s a step-by-step guide on how to replace missing asphalt shingles safely and effectively.
Step-by-Step Instructions for Replacing Missing Shingles
Step 1: Ensure Safety
Safety is the top priority. Use a sturdy ladder on level ground and consider a roof harness if your roof is steep. Wear gloves and non-slip shoes to protect your hands and maintain traction.
Step 2: Remove Damaged or Remaining Shingle Pieces
Carefully lift the shingles surrounding the missing shingle area using a pry bar. Remove any damaged or partially broken shingles. Take care not to damage the surrounding shingles, as they will be part of the new installation. Remove old nails or debris to create a clean surface.
Step 3: Check the Roof Deck and Underlayment
Inspect the roof deck beneath the missing shingle for any damage, rot, or moisture. If the underlayment is torn or worn, cut a small piece to replace it before installing the new shingle. A secure underlayment is essential to prevent leaks.
Step 4: Prepare the Replacement Shingle
If necessary, trim the replacement shingle to match the size and shape of the original. Most asphalt shingles have tabs or pre-cut sections that make this easier. Ensure that the replacement shingle aligns properly with the existing shingles and the roof slope.
Step 5: Slide the Replacement Shingle into Place
Lift the shingles above the gap slightly to slip the new shingle underneath the overlapping layer. The top edge of the new shingle should tuck under the existing shingles above it, while the bottom edge aligns flush with the shingles below. Make sure the new shingle sits evenly with the surrounding roof surface.
Step 6: Nail the Shingle Securely
Using galvanized roofing nails, fasten the replacement shingle in place. Typically, nails are placed just below the shingle tabs. Be careful not to overdrive the nails, as this can damage the shingle and reduce its waterproofing ability. Ensure all nails are securely holding the shingle without bending or tearing it.
Step 7: Seal the Edges
Apply roofing cement or sealant to the edges of the replacement shingle and over the nail heads. This step is essential for creating a watertight seal, preventing wind from lifting the shingle, and protecting your roof from leaks. Smooth the sealant with a putty knife to ensure full coverage.
Step 8: Inspect Your Work
After installing the replacement shingle, check the alignment and ensure it’s level with surrounding shingles. Make sure there are no gaps or lifted edges. Brush away any debris from the roof surface to prevent future water collection or damage.