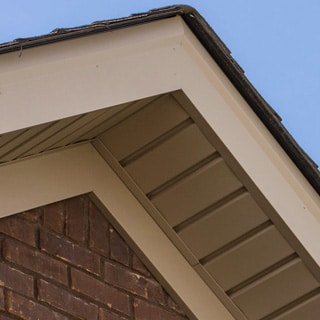
Aluminum fascia wrap helps protect the wooden fascia boards along your roofline from moisture, pests, and weather damage. Over time, however, strong winds, temperature fluctuations, improper installation, or aging fasteners can cause sections of aluminum fascia wrap to become loose or detached. If left unaddressed, loose fascia wrap can allow water to penetrate behind the metal, potentially leading to wood rot, mold growth, and costly exterior repairs.
Fortunately, homeowners with basic DIY skills can often repair loose aluminum fascia wrap before more serious damage develops. This guide explains how to repair loose or detached aluminum fascia wrap safely and effectively.
Step 1: Inspect the Damage
Start by carefully examining the affected section of fascia wrap. Set up your ladder on stable, level ground and wear appropriate safety gear.
Look for:
- Loose or missing fasteners
- Bent or warped aluminum
- Sections pulled away by wind
- Water damage behind the wrap
- Signs of wood rot in the fascia board
If the aluminum is only slightly loose and otherwise undamaged, a simple reattachment may solve the problem. Severely bent, torn, or corroded sections should typically be replaced.
Step 2: Remove Loose Fasteners
Carefully remove any damaged nails or screws that are no longer holding the fascia wrap securely. Use a pry bar or drill as needed.
Be cautious not to bend the aluminum further during removal. If fastener holes have become enlarged, plan to install new fasteners slightly above or below the original location to achieve a stronger hold.
Step 3: Check the Fascia Board
Before reattaching the aluminum, inspect the wood fascia board underneath. Press gently against the wood with a screwdriver. Soft spots, crumbling wood, or visible discoloration may indicate moisture damage or rot.
For minor imperfections, fill damaged areas with exterior-grade wood filler and allow it to dry completely. If significant rot is present, replace the affected section of fascia board before reinstalling the aluminum wrap. Skipping this step can result in the repair failing prematurely because the fasteners will not have a solid surface to grip.
Step 4: Straighten the Aluminum Fascia Wrap
If the fascia wrap has become bent or slightly distorted, carefully reshape it by hand. Work slowly to avoid creating sharp creases. Minor bends can often be smoothed out and repositioned without replacing the material. However, heavily damaged sections may need to be cut out and replaced with new aluminum wrap. Use tin snips to trim replacement sections to the proper size if necessary.
Step 5: Reattach the Fascia Wrap
Position the aluminum fascia wrap tightly against the fascia board. Install aluminum trim nails or painted trim screws every 16 to 24 inches, depending on the manufacturer’s recommendations and local weather conditions.
Avoid overdriving the fasteners. The aluminum should be held securely in place but still have enough room to expand and contract with temperature changes. Work from one end of the section to the other, checking frequently to ensure the wrap remains straight and flush against the fascia board.
Step 6: Seal Gaps and Joints
Once the fascia wrap is secure, inspect all seams, corners, and joints.
Apply a small bead of exterior-grade caulk or sealant anywhere water could potentially enter behind the metal. Smooth the sealant with a gloved finger or caulking tool for a clean appearance.
Proper sealing helps prevent future moisture intrusion and extends the life of both the aluminum wrap and the wood beneath it.
Step 7: Perform a Final Inspection
After completing the repair, step back and visually inspect the entire roofline.
Make sure:
- The fascia wrap sits flat against the board
- All fasteners are secure
- No gaps remain between sections
- Sealant is evenly applied
- The repaired area matches the surrounding fascia
If desired, touch up exposed fastener heads with matching paint to improve curb appeal.
When DIY Repairs May Not Be Enough
While many loose fascia wrap issues can be addressed with basic tools and materials, larger problems often require professional attention. Extensive wood rot, widespread storm damage, sagging gutters, or recurring moisture issues may indicate underlying structural concerns that need expert evaluation.
Working on ladders near roof edges can pose significant safety risks, especially on multi-story homes or steep rooflines. Please contact the pros at PJ Fitzpatrick if you’re at all unsure of your ability to complete this task.