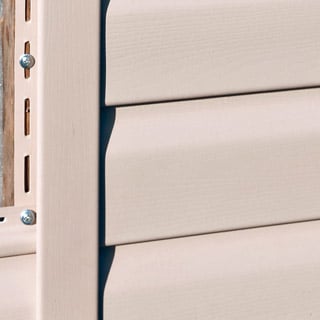
J-channel is an important component of a vinyl siding system. Installed around windows, doors, and other openings, J-channel helps create a finished appearance while directing water away from vulnerable areas of your home’s exterior. When J-channel becomes cracked, warped, loose, or damaged by weather, it can allow moisture to penetrate behind the siding and potentially lead to water damage.
Fortunately, replacing damaged J-channel is a project that many experienced DIY homeowners can tackle with the right tools and preparation. This guide explains how to replace damaged J-channel around vinyl siding windows and doors while helping maintain the integrity of your siding system.
Steps To Replace Damaged J-Channel Around Siding, Windows, and Doors
Before removing any materials, carefully inspect the damaged area. Determine whether the entire J-channel section needs replacement or if only a small portion has been affected.
Look for:
- Cracks or splits
- Warping or bending
- Missing sections
- Loose nails
- Signs of water intrusion
- Mold or rot around the window or door frame
If you discover significant water damage behind the siding, additional repairs may be necessary before installing new J-channel.
Step 1: Remove The Surrounding Vinyl Siding
To access the damaged J-channel, you’ll need to remove the siding panels immediately surrounding the window or door. Using a vinyl siding removal tool, unlock the bottom edge of the siding panel from the piece below it. Gently work along the length of the panel until it releases.
Once unlocked, carefully remove the nails holding the siding panel in place. Set the panel aside in a safe location to prevent damage. Continue removing enough siding to expose the damaged J-channel completely.
Step 2: Remove The Damaged J-Channel
After the siding has been removed, locate the fasteners securing the J-channel to the wall. Use a pry bar or hammer to carefully remove the nails without damaging the surrounding materials. Once the fasteners are removed, gently pull the J-channel away from the window or door opening.
Take note of how the existing pieces overlap at corners and joints. Proper overlap is essential for effective water management and should be duplicated during installation.
Inspect the exposed area for signs of moisture damage before proceeding.
Step 3: Measure and Cut The Replacement J-Channel
Measure the length of each section you need to replace. Transfer the measurements to the new J-channel and mark the cut lines.
Using tin snips, cut the replacement pieces to size. For corners, create the same overlap pattern as the original installation. Proper overlapping helps channel water away from the opening and prevents leaks. Take your time with measurements and cuts to ensure a clean, professional appearance.
Step 4: Check Flashing and Water Protection
Before installing the new J-channel, inspect any existing flashing around the window or door. If flashing is damaged or missing, install new flashing tape according to manufacturer recommendations. Proper flashing provides an additional layer of moisture protection behind the siding system.
This is also a good opportunity to apply exterior-grade sealant where necessary around the window or door frame.
Step 5: Install The New J-Channel
Position the replacement J-channel around the opening and verify the fit before fastening it in place. Install the side pieces and top sections according to the original configuration. Use galvanized siding nails or roofing nails to secure the J-channel.
When nailing vinyl components, avoid driving nails tightly against the material. Leave a small amount of space beneath the nail head to allow for expansion and contraction caused by temperature changes.
Fasten the J-channel through the center of the nailing slots whenever possible. Double-check that all overlaps direct water away from the window or door opening.
Step 6: Reinstall The Vinyl Siding
Once the new J-channel is securely installed, reinstall the siding panels that were removed. Position each panel and secure it with nails according to manufacturer recommendations. Again, avoid overdriving nails to allow for normal movement.
After fastening the panels, use the siding removal tool to lock the panels back together. Inspect the finished installation to ensure the siding sits properly within the J-channel and all seams appear straight and secure.
Step 7: Perform A Final Inspection
After the repair is complete, inspect the area carefully.
Check for:
- Proper J-channel alignment
- Secure siding connections
- Correct corner overlaps
- Gaps that may require sealant
- Signs of loose fasteners
If possible, test the repair by spraying water around the window or door with a garden hose to verify that water drains properly and does not penetrate behind the siding.
When To Call A Professional
While replacing a section of damaged J-channel can be a manageable project for skilled DIYers, some situations are best left to professionals. Professional siding contractors have the experience and tools necessary to identify hidden issues and ensure repairs are completed correctly.
You may want to contact a siding contractor if:
- Water damage is present behind the siding
- Multiple sections of J-channel are failing
- The siding system has extensive damage
- Windows or doors are leaking
- You are working on upper-story areas that require ladder work