Water intrusion is one of the most common and costly issues homeowners face, and in many cases, it starts in overlooked areas of the roof. One of the most critical, yet often missing, components of a properly protected roofing system is kickout flashing. Installed where a roof edge meets a vertical wall, kickout flashing directs water away from the siding and into the gutter, preventing leaks, rot, and structural damage.
If your home doesn’t have kickout flashing, or if it’s improperly installed, you could be at risk for hidden water damage. Fortunately, installing kickout flashing is a manageable project for experienced DIYers and an essential upgrade for long-term home protection.
Why Kickout Flashing Is Important
Kickout flashing plays a crucial role in protecting your home from water damage. Without it, rainwater running down the roof can slip behind the siding where the roof meets a wall. Over time, this can lead to mold growth, wood rot, insulation damage, and even interior leaks. Properly installed kickout flashing ensures that water is directed safely into the gutter system, preserving both your roof and your home’s structure.
Step-by-Step Instructions
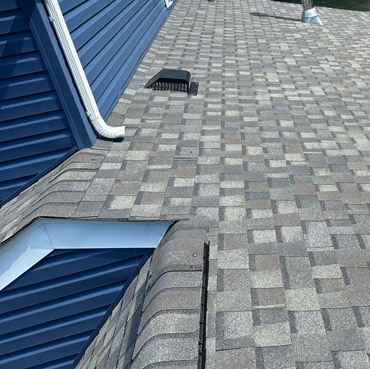
1. Inspect The Roof-to-Wall Intersection
Start by identifying the area where the roof meets a vertical wall, this is typically where kickout flashing should be installed. Look for signs of water damage, such as staining, rotting wood, or peeling paint. If there is existing flashing, check whether it is properly directing water into the gutter or if it needs to be replaced.
2. Remove Existing Materials
Carefully lift or remove the shingles and any existing flashing at the lower end of the roof-to-wall intersection. Use a pry bar to loosen nails without damaging surrounding materials. This step creates space for the new kickout flashing and ensures proper installation.
3. Prepare The Area
Once the area is exposed, clean away any debris or old sealant. If you’re using an ice and water shield, apply it along the roof edge and up the wall for added moisture protection. This extra layer helps prevent water from penetrating beneath the flashing.
4. Install The Kickout Flashing
Position the kickout flashing at the base of the roof-to-wall intersection, ensuring it directs water away from the wall and into the gutter. The angled “kick” portion should extend outward to guide water flow properly. Secure the flashing with roofing nails, placing them where they will be covered by shingles to prevent exposure.
5. Integrate With Step Flashing and Shingles
Once the kickout flashing is in place, reinstall the shingles and integrate them with step flashing along the wall. Each piece of step flashing should overlap the one below it, creating a layered barrier that directs water downward. Proper overlap is essential to ensure water flows seamlessly into the kickout flashing.
6. Seal The Edges
Apply roofing sealant or exterior-grade caulk along any exposed seams or edges to prevent water infiltration. Be careful not to over-seal areas that need to allow water to flow freely. The goal is to create a watertight system without trapping moisture.
7. Test Water Flow
After installation, use a garden hose to simulate rainfall and observe how water flows down the roof. Make sure it is being directed into the gutter and not behind the siding. This final check helps confirm that your kickout flashing is functioning correctly.
Maintenance Tips For Your Home
To keep your kickout flashing working effectively, it’s important to perform regular maintenance and inspections. Check the area periodically, especially after heavy storms, to ensure everything is intact and functioning properly. Keeping your gutters clean will help prevent water from overflowing and bypassing the flashing, while inspecting for loose shingles or damaged flashing components can help you catch issues early. If you notice any signs of water damage, address them right away to avoid more serious problems. With consistent upkeep, you can extend the life of your roof and prevent costly repairs down the line.
When To Call A Professional
While installing kickout flashing can be a DIY project, it does require working at heights and integrating materials into your roofing system correctly. Mistakes in installation can lead to serious water damage, so if you’re unsure or dealing with extensive issues, it’s best to consult a professional roofing contractor.