Nail pops in vinyl siding are a common issue that many homeowners encounter over time. They occur when the fasteners holding siding panels in place begin to loosen, causing the nail heads to push outward or become visible through the siding surface. While this may seem like a minor cosmetic problem, nail pops can actually compromise the siding’s ability to protect your home from moisture, wind, and pests. The good news is that in many cases, you can repair nail pops in vinyl siding without removing entire panels.
Understanding how to properly address this issue can help preserve your home’s exterior, improve curb appeal, and extend the life of your siding system.
Step-by-Step Instructions
1. Identify the Nail Pops
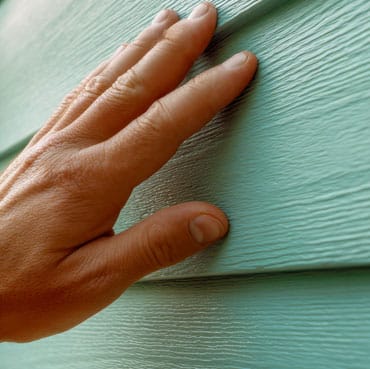
Start by inspecting your vinyl siding carefully. Nail pops typically appear as bulging areas, loose panels, or visible nail heads along horizontal seams. Mark each affected area so you can repair them systematically.
It’s important to determine whether the siding is simply loose or if underlying issues, such as wall movement or improper installation, are contributing to the problem.
2. Use a Zip Tool to Access the Panel
- Insert a vinyl siding zip tool under the bottom edge of the panel directly above the nail pop.
- Slide the tool along the seam to disengage the locking mechanism.
- Gently lift the panel to expose the nail or fastener underneath.
This allows you to access the problem area without dismantling large sections of siding.
3. Remove or Reset the Loose Fastener
- Check the nail or screw causing the pop.
- If it is loose or backing out, remove it completely.
- Inspect the surrounding sheathing for damage or deterioration.
If the hole is oversized, insert a small shim or exterior-grade filler to provide a more secure grip for the new fastener.
4. Reattach the Siding Properly
- Reposition the siding panel into its original alignment.
- Install a new corrosion-resistant nail or screw through the factory nailing hem.
- Do not overtighten, the fastener should be snug but still allow the siding to expand and contract with temperature changes.
Vinyl siding must be installed with slight “float” to accommodate movement, so avoid driving fasteners too tightly into the wall.
5. Secure and Seal if Necessary
- Apply exterior-grade caulk sparingly to seal small openings.
- Ensure that water cannot penetrate behind the siding.
- Wipe away excess caulk for a clean finish.
If insulation is visible or damaged behind the siding, consider adding a small amount of foam insulation before sealing.
6. Lock the Panel Back into Place
- Use the zip tool again to re-lock the siding panel into the one below it.
- Press firmly along the seam to ensure a secure connection.
- Check alignment to make sure the panel sits flush with surrounding sections.
7. Inspect Your Work
Step back and visually inspect the repaired area. The siding should appear smooth, with no visible bulges or exposed fasteners. Properly repaired nail pops should blend seamlessly into the rest of the exterior.
Preventing Future Nail Pops
To reduce the likelihood of future issues, ensure that siding is installed with proper spacing to allow for natural expansion and contraction, as vinyl can shift with temperature changes. Fasteners should always be driven securely into wall studs rather than just the sheathing to maintain long-term stability. It’s also important to use corrosion-resistant materials that can withstand moisture and weather exposure without weakening over time. In addition, make sure the home’s exterior walls are not experiencing hidden moisture damage or structural shifting, as these conditions can contribute to recurring siding problems. Regular inspections, especially after seasonal temperature fluctuations, can help you identify and address small issues early before they develop into more costly repairs.