Silicone caulk is a popular choice for sealing gaps in bathrooms, kitchens, windows, and other moisture-prone areas because it is flexible, durable, and highly water-resistant. It resists cracking, shrinking, and mold growth better than many other sealants, making it ideal for tubs, showers, sinks, and backsplashes. However, even the highest-quality caulk will eventually wear out, discolor, peel, or lose its seal over time.
Before you can apply a fresh bead of caulk, it’s important to completely remove the old silicone. Leaving behind residue can prevent new caulk from bonding properly, leading to leaks and premature failure. While removing silicone caulk can take some patience, using the right tools and techniques will make the job much easier.
Below are step-by-step instructions for how to remove silicone caulk safely and effectively.
Step-by-Step Instructions
Step 1: Cut Along the Caulk Line
The first step in removing silicone caulk is loosening the bond between the sealant and the surrounding surface.
Using a sharp utility knife, carefully slice along both edges of the caulk bead where it meets the wall, tile, tub, sink, or countertop. Take your time and apply steady pressure rather than forcing the blade. The goal is to separate the silicone from the surface without scratching nearby materials.
Because razor blades are sharp and spaces are often tight, wearing protective gloves is recommended to help avoid accidental cuts.
Step 2: Pull Away the Loose Caulk
Once the edges have been cut, use needle-nose pliers to grab one end of the silicone bead and gently pull it away.
In many cases, long strips of caulk may peel off in one piece if the seal has already weakened. If the silicone breaks apart, continue loosening sections and pulling them free as you go.
Don’t worry if some stubborn residue remains—this is completely normal with silicone caulk.
Step 3: Scrape Off Remaining Silicone
After removing the larger pieces, you’ll likely notice small fragments or thin layers of silicone still attached to the surface.
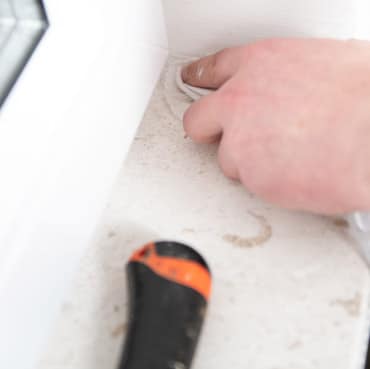
Use a putty knife, plastic scraper, or glass scraper to gently remove remaining material. Work carefully, especially around delicate surfaces such as porcelain tubs, glass shower doors, finished countertops, or ceramic tile.
Avoid using excessive force, as aggressive scraping may scratch or damage the surrounding materials.
Step 4: Soften Stubborn Residue
Silicone caulk is designed to create a watertight seal, which means small bits of residue often remain lodged in crevices or corners.
To loosen stubborn remnants, soak an abrasive pad or cloth with mineral spirits or a silicone caulk remover and press it against the residue for several minutes. This helps soften the silicone, making it easier to remove.
Once softened, return to your scraper or putty knife and carefully remove any leftover material.
Step 5: Clean the Surface Thoroughly
Before applying new caulk, the area must be completely clean and dry. Use a mild household cleaner to wipe down the surface and remove dust, debris, oils, or leftover solvent residue. Even small amounts of residue can interfere with adhesion and prevent new caulk from sealing properly.
After cleaning, allow the area to dry fully. Applying fresh caulk to damp surfaces can lead to poor adhesion and reduced durability.
Tips for Better Results
To make the process easier and improve the finished result, keep these tips in mind:
- Work slowly to avoid damaging surrounding materials
- Replace dull blades for cleaner cuts
- Use a specialized silicone remover for especially stubborn caulk
- Ensure the surface is fully dry before recaulking
- Remove all residue for the strongest seal possible